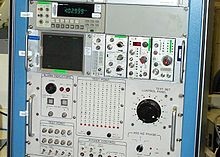
Calibration

As I work on my current automotive-related project I have reached the point where the system is operating in Auto Mode and testing a throttle body. There are various tests performed on this system including leak and flow tests, physical measurements using LVDTs, torque measurements using both transducers and servo motors, vision inspections and press force measurements. All of these devices have to be accurately scaled into engineering units and then periodically calibrated against parts with known physical characteristics.
Calibration is a comparison between measurements – one of known magnitude or correctness made or set with one device and another measurement made in as similar a way as possible with a second device.
The device with the known or assigned correctness is called the standard. The second device is the unit under test (UUT), test instrument, or any other name for the device being calibrated.
Calibration can be called for:
• with a new instrument
• when a specified time period is elapsed
• when a specified usage (operating hours) has elapsed
• when an instrument has had a shock or vibration which potentially may have put it out of calibration
• sudden changes in weather
• whenever observations appear questionable
In general use, calibration is often regarded as including the process of adjusting the output or indication on a measurement instrument to agree with value of the applied standard, within a specified accuracy. For example, a thermometer could be calibrated so the error of indication or the correction is determined, and adjusted (e.g. via calibration constants) so that it shows the true temperature in Celsius at specific points on the scale. This is the perception of the instrument’s end-user. However, very few instruments can be adjusted to exactly match the standards they are compared to. For the vast majority of calibrations, the calibration process is actually the comparison of an unknown to a known and recording the results.
Calibration is used in automation in most process, chemical or instrumentation-related industries. Automotive, Pharmaceutical and any other industries related to manufacturing usually also require periodic calibration of devices.
To improve the quality of the calibration and have the results accepted by outside organizations it is desirable for the calibration and subsequent measurements to be “traceable” to the internationally defined measurement units. Establishing traceability is accomplished by a formal comparison to a standard which is directly or indirectly related to national standards (NIST in the USA), international standards, or certified reference materials.
Quality management systems call for an effective metrology system which includes formal, periodic, and documented calibration of all measuring instruments. ISO 9000 and ISO 17025 sets of standards require that these traceable actions are to a high level and set out how they can be quantified.

Calibration is an important part to any Measurement Instrument process. Choice of equipment is also key to successful and accurate calibration. Not all instrumentation is the same.